
Table of Contents
- Why Documenting Office Hygiene Protocols Matters
- The Daily Office Cleaning Checklist: What to Include
- Building Your Office Cleaning Schedule Template
- High-Touch Surface Cleaning Checklist: Prioritizing Contact Points
- Creating a Usable Office Cleaning Log Template
- Cleaning vs. Disinfecting: Safe Product Use and Documentation
- Verification, Accountability, and Corrective Actions
- Conclusion
- Frequently Asked Questions
Last Updated: October 20, 2026
Why Documenting Office Hygiene Protocols Matters
Most offices clean. Few can prove it. That gap is where office hygiene protocols earn their keep. A written record turns “we wipe things down” into a defensible, repeatable system that protects employees and holds vendors accountable.
Here’s the core argument: a cleaning checklist is not a record. It’s a plan. Documentation is the trail that proves the plan ran. Many businesses find that the difference between a clean-looking office and a genuinely hygienic one comes down to what gets written down.
The CDC guidance on cleaning and disinfecting facilities makes a key distinction: cleaning removes germs, disinfecting kills them. You need both, and you need proof of both.
Below, we’ll show you exactly how to build the documents, logs, and verification steps that make daily hygiene defensible.
A cleaning task that isn’t documented didn’t happen. Build the record first, then the routine follows.
The Daily Office Cleaning Checklist: What to Include
A daily office cleaning checklist is a task list tied to specific areas, assigned to a responsible person, and signed off on completion. It should cover the tasks your team repeats every single day, not the deep work.
Most daily lists miss the same items. Here’s what a solid one includes:
- Desk and workstation wipe-downs with approved products
- Shared surfaces: conference tables, reception counters, copier panels
- High-touch points: door handles, light switches, shared keyboards
- Wastepaper baskets and trash bins emptied and relined
- Kitchen and break room: counters, sink, appliance handles, vending machines
- Restroom restock and surface clean
- Floors: spot vacuuming and damp mopping in traffic lanes
Keep the daily list short enough to finish in one shift. If it takes two pages, it’s a schedule, not a daily routine.
A common mistake is lumping weekly tasks like window cleaning or deep dusting into the daily sheet. That bloats the list and trains people to skip items.
If your daily checklist has more than about 20 line items, people start initialing without cleaning. Keep daily lists tight and move the rest to weekly or monthly.
Building Your Office Cleaning Schedule Template
An office cleaning schedule template maps every task to a frequency and a responsible person. Daily, weekly, and monthly tasks live on one document so nothing falls through. But a schedule alone is still a plan, not a record. The template has to double as a procedure document that a new hire can follow and a supervisor can audit.
Structure it in three tiers:
- Daily tasks – surfaces, high-touch points, trash, restrooms, floors
- Weekly tasks – deeper dusting, floor machine work, window interiors, appliance cleaning
- Monthly tasks – vents, baseboards, deep carpet care, storage areas
Each row should carry six fields, not four. The first four define the work; the last two make it documentable:
| Field | What it captures | Example entry |
|---|---|---|
| Task | The specific action | Wipe and disinfect break room counters |
| Location | The exact area or asset | Break room, north counter and sink |
| Frequency | How often it runs | Daily, every shift |
| Responsible person | One named owner per area | M. Alvarez (day porter) |
| Completion time | When the task actually finished | 8:15 AM |
| Sign-off | Who confirms completion | Initials plus supervisor check |
A useful rule: assign one responsible person per area, not per task. When five people share one job, nobody owns it. The template should show that owner in every row for that area so there is no ambiguity at sign-off.
Build the template so it can be printed on one page per area. A break room sheet, a restroom sheet, and a lobby sheet each carry their own rows, which keeps the daily list short and makes the log easy to file by location. If a single master sheet runs past two pages, split it by area.
The OSHA guidance on workplace housekeeping treats housekeeping as a core part of a safe workplace. That framing helps when you justify the schedule to leadership, and it also supports keeping the template on file as a written procedure rather than a verbal understanding.
Version the template. Put a revision date and a version number in the footer of every sheet. When a task changes, issue a new version and retire the old one so auditors never compare two different documents.
High-Touch Surface Cleaning Checklist: Prioritizing Contact Points
High-touch surface cleaning should happen more often than general surface cleaning. Contact points get touched by dozens of hands a day, so they carry the highest transfer risk.
Prioritize these contact points:
- Door handles and push plates
- Light switches and thermostat panels
- Shared keyboards, mice, and touchscreens
- Copier and printer control panels
- Break room faucets, microwave handles, and refrigerator doors
- Elevator buttons and handrails
- Reception desk surfaces and shared pens
A risk-based approach beats a uniform one. Clean the highest-traffic contact points first, then work outward. Many teams find that front-loading high-touch work in the morning catches the busiest hours.
Document which points were cleaned and when. A short high-touch log with a timestamp per point is enough. This is the record that answers “was the copier panel cleaned today?”
Photograph your high-touch points once and attach the photos to the protocol. New staff identify the exact surfaces faster, and auditors see precisely what “high-touch” means in your building.
Creating a Usable Office Cleaning Log Template
An office cleaning log template is the fill-in form that records what was cleaned, by whom, and when. It’s the difference between a plan and proof.
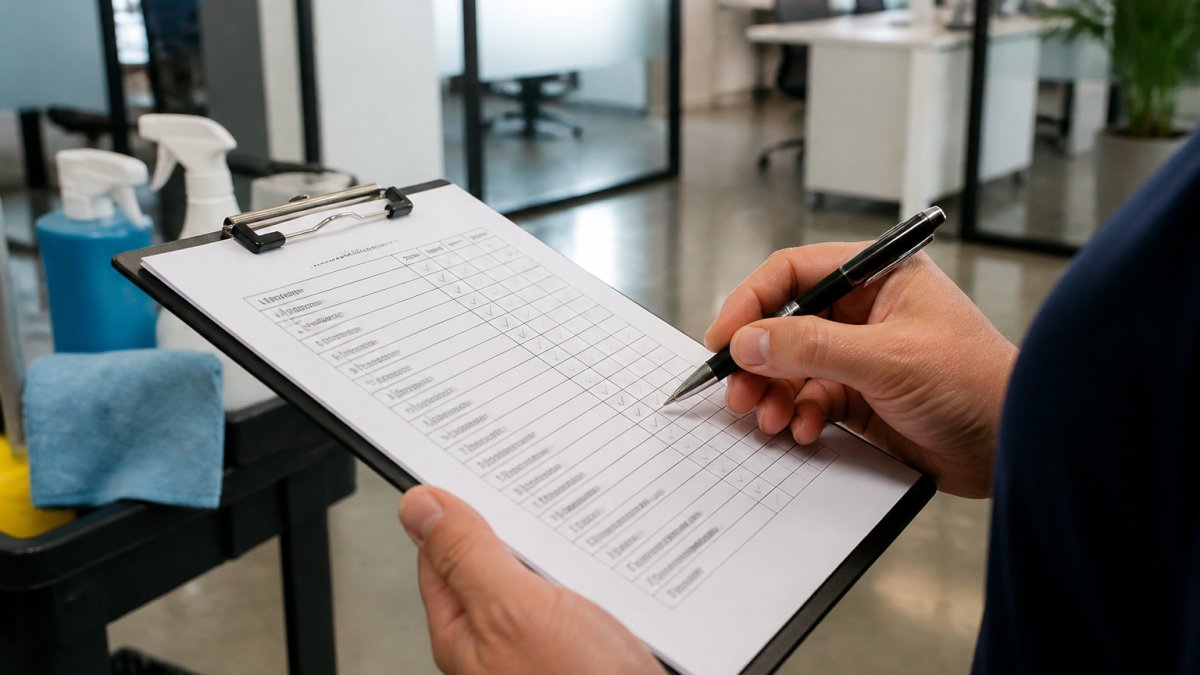
A usable log needs these columns:
| Field | Purpose | Example Entry |
|---|---|---|
| Date and time | Proves when the task ran | 10/20/26, 8:15 AM |
| Area | Locates the work | Break room |
| Task | Names what was done | Counters wiped, trash emptied |
| Responsible person | Assigns accountability | Initials or name |
| Product used | Supports safe-use records | EPA-registered disinfectant |
| Sign-off | Confirms completion | Initials plus supervisor check |
Keep one log per area or one master log per shift. Whichever you choose, make it fast to fill out. A log that takes ten minutes to complete gets faked.
Store completed logs for at least a month, longer if you have audit or client requirements. Digital logs make retention and search far easier than paper.
Cleaning vs. Disinfecting: Safe Product Use and Documentation
Cleaning and disinfecting are not the same step, and your protocol should document both separately. Cleaning removes dirt and germs from a surface. Disinfecting kills germs on a surface after it’s been cleaned.
Document three things for every product:
- Which product was used and where
- Dwell time (how long it stayed wet to work)
- Who applied it and when
Follow the label. The EPA guidance on using registered disinfectants safely is clear that disinfectants must stay wet for the labeled contact time to work. Wiping immediately after spraying defeats the purpose.
For eco-friendly programs, note the product line on the log. This matters when employees ask about chemical smells or equipment sensitivity. Clean and green products still need proper dwell times and safe handling.
A common mistake is using one product for everything. Some surfaces, like screens and certain equipment, need gentler products. Document which product goes where so nobody guesses.
Skipping dwell time is the most common disinfecting error. Spray-and-wipe leaves germs alive. Document the contact time on your log so crews can’t shortcut it.
Verification, Accountability, and Corrective Actions
Verification is how you confirm the work actually happened, and it’s the step most protocols skip. A log proves someone signed off. An inspection proves the sign-off was honest. The difference between the two is where accountability lives.
Build a simple three-part loop, and document each part so the trail is visible:
- Spot checks – a supervisor inspects a few areas each day against the checklist and records the result, pass or fail, with a time stamp.
- Sign-off review – compare logs to inspection results weekly. A task marked complete that fails inspection is a documentation error, not just a cleaning error, and both get recorded.
- Corrective actions – when a task was missed or done poorly, log the fix and who owns it, then record the re-clean and the close-out date.
A corrective action entry needs five fields to be useful: the date the issue was found, the area and task, what was wrong, the corrective action taken (including any re-cleaning), and the date and initials of the person who verified the fix. Without the close-out field, the log shows a problem but never shows it was resolved.
A common pattern is to treat a missed task as a one-line note. That loses the trail. Instead, give each exception its own row on an exception log, separate from the daily checklist, so patterns are visible. If the same restroom fails three weeks running, the exception log shows it and the corrective action can address the cause, not just the symptom.
Task assignment matters here too. When everyone knows who owns each area, verification gets faster and blame gets rarer. Many facility managers find that a weekly ten-minute log review catches problems before clients notice.
For teams managing multiple buildings or mixed-use facilities, digital records help. Scanned logs and timestamped entries create an audit trail that’s easy to produce on request. Keep completed logs for at least a month, longer if you have audit or client requirements, and store them by date and area so a reviewer can pull a single day’s record without searching.
A corrective action that isn’t closed out is worse than no entry at all. It documents that you knew about a problem and stopped tracking it. Always record the re-clean and the verification date.
Conclusion
The hardest part of office hygiene isn’t the cleaning. It’s proving it happened, every day, across every area.
Guso Janitorial Services builds that proof into the work. Our teams are available 24/7, use clean and green products, and are fully licensed, bonded, and insured. We tailor cleaning programs to your facility, whether that’s an office, a manufacturing floor, or a high-traffic retail space.
Get started with Guso Janitorial Services and turn your daily hygiene routine into a documented, defensible system. Call today.
Frequently Asked Questions
What should a daily office hygiene checklist include?
A daily office hygiene checklist should cover all high-touch points (door handles, light switches, shared keyboards, phones), restroom cleaning and restocking, break room and kitchen surfaces, waste removal, floor vacuuming or mopping, and desk and workstation cleaning. Include specific tasks, assigned staff, frequency, and a sign-off column. This ensures nothing is missed and provides a record for accountability. Keep the checklist visible and updated daily.
How do you document daily office cleaning tasks?
Document daily office cleaning tasks using a log template that records date, task description, assigned cleaner, time completed, and initials. Use a printed sheet or digital tool. For high-touch surfaces, note the time and product used. Store logs for at least 30 days for verification. Review logs weekly to spot missed tasks and take corrective action. This creates a clear audit trail and supports consistent office hygiene protocols.
Who should complete and sign a daily cleaning log?
The cleaning staff member who performed the task should complete and sign the daily cleaning log. For verification, a supervisor or office manager should review and initial the log at the end of each shift. This dual sign-off ensures accountability and allows for immediate corrective actions if tasks are incomplete. In larger facilities, team leads may sign off on behalf of their crew.
How often should high-touch office surfaces be cleaned?
High-touch surfaces such as door handles, light switches, shared keyboards, and phones should be cleaned and disinfected at least once daily, and more frequently in high-traffic areas or during flu season. Use a high-touch surface cleaning checklist to track each item. Some facilities clean these surfaces twice daily. Always follow product instructions for dwell time to ensure effective disinfection.
Leave a Reply