
Table of Contents
- Why Drywall Dust Is Different From Regular House Dust
- What You’ll Need Before You Start
- Step 1: Contain the Dust and Protect HVAC Systems
- Step 2: Remove Debris and Vacuum Surfaces With the Best Vacuum for Drywall Dust
- Step 3: How to Clean Drywall Dust From HVAC Vents
- Step 4: Damp Cloth vs. Dry Dusting for Walls, Ceilings, and Trim
- Step 5: Mop Floors and Repeat Until Residue Is Gone
- Post-Construction Cleaning Checklist for Every Room
- Frequently Asked Questions
Last Updated: September 28, 2026
Why Drywall Dust Is Different From Regular House Dust
Drywall dust is a fine, powdery byproduct of sanding joint compound. Its particles stay airborne for hours and settle into every crevice, which is why standard dusting routines fail when you need to know how to remove drywall dust after renovation.
Never dry-sweep or use a standard household vacuum on drywall dust. A shop vac without a HEPA filter will blow fine particulate matter straight back into the air, and dry sweeping just redistributes it onto surfaces you already cleaned.
What You’ll Need Before You Start
Gathering the right tools first prevents the stop-and-start cycle that spreads dust further. The essentials fall into four categories: containment, protection, removal, and finishing.
- Plastic sheeting and painter’s tape for sealing doorways and vents
- A shop vac rated for fine dust with a HEPA filter
- Microfiber cloths and two buckets, one for clean water and one for rinse water
- A mild detergent or a diluted vinegar solution
- A tack cloth for final surface preparation before painting
- A respirator rated for fine particulate matter, safety goggles, and disposable gloves
- A crevice tool and a soft-bristle brush for grout and trim
Step 1: Contain the Dust and Protect HVAC Systems
Containment is the step most people skip, and it determines how long the cleanup takes. Seal off the work area before removing a single speck of dust.
Sealing vents and doorways
Hang plastic sheeting over doorways and tape the edges. Cover every supply and return vent in the affected rooms with plastic and secure it with tape. This stops airborne dust from migrating through the ventilation system, where it would settle into ducts and recirculate for months.
Filter replacement and air quality protection
Turn off the HVAC system before cleaning, then check the air filter and replace it if coated. Running the system during cleanup pulls dust into the return and distributes it through every connected space. After the job, replace the filter again and consider having the ducts inspected.
Photograph your HVAC filter before and after the project. It gives you a clear record of how much dust the system captured and helps you decide whether duct cleaning is worth scheduling.
Step 2: Remove Debris and Vacuum Surfaces With the Best Vacuum for Drywall Dust
The best vacuum for drywall dust is a shop vac fitted with a true HEPA filter, not a household vacuum. Standard vacuums lack the filtration to trap fine particulate matter and exhaust it back into the room.
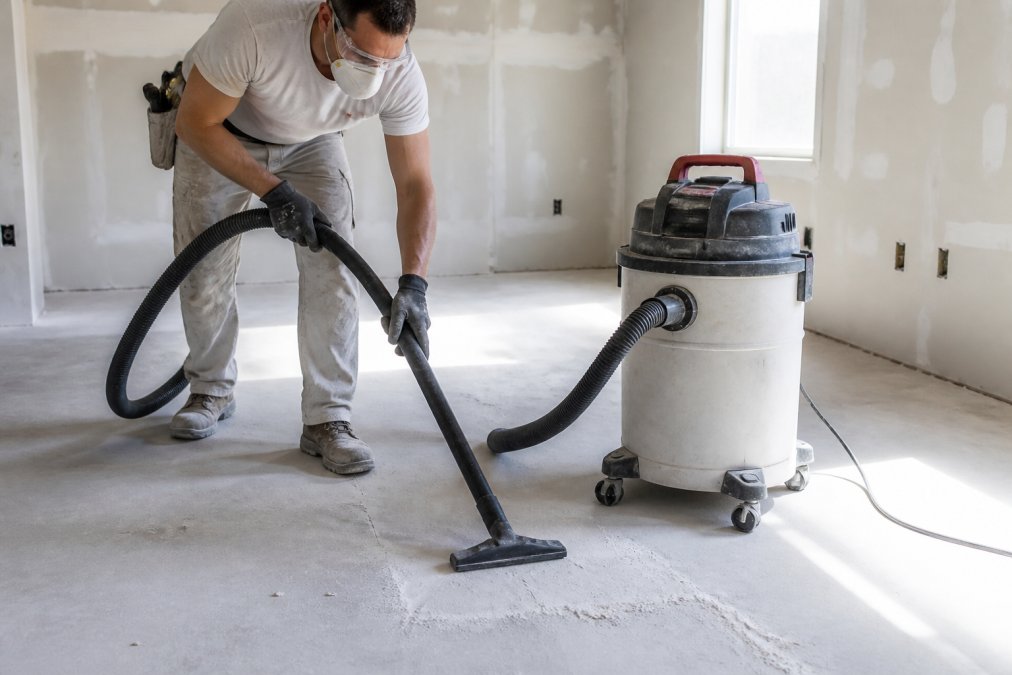
HEPA filtration and shop vac setup
Fit the shop vac with a HEPA filter and, if supported, a collection bag. Work from the top of the room downward so gravity carries loosened dust toward the floor, which you vacuum last.
Crevice tools and grout cleaning
Switch to a crevice tool for corners, baseboards, window tracks, and floorboard gaps. For grout and tile, use a soft-bristle brush attachment to lift dust without scratching. Vacuum slowly; fast passes leave residue behind.
The vacuum is the workhorse of this job. Everything after it, the damp wiping and mopping, is finishing work. If you skip proper HEPA vacuuming, no amount of wiping will get the dust out.
Step 3: How to Clean Drywall Dust From HVAC Vents
Vents are where leftover drywall dust hides and then recirculates through the whole building. Most guides treat vent cleaning as a quick wipe-down, but the real work is protecting the HVAC system before, during, and after the job. Get this wrong and you will re-clean rooms for weeks.
Why the HVAC system is the biggest hidden risk
A forced-air system moves hundreds of cubic feet of air per minute. When drywall dust is airborne, every return grille acts like a vacuum intake, pulling fine particulate matter into the ductwork and blower compartment. That dust coats the evaporator coil, settles in duct runs, and gets pushed back into living spaces every time the system cycles.
Protecting vents and filters before cleanup
- Turn the HVAC system off at the thermostat before you remove a single speck of dust. Do not run the fan, even in “fan only” mode.
- Cover every supply and return grille in the affected rooms with plastic sheeting and painter’s tape. Seal the edges completely; a loose corner lets dust bypass the barrier.
- If the air handler or furnace is accessible, check the filter before you start. A filter loaded with construction dust cannot capture more, and running the system pushes that dust downstream.
- Close the damper on any zone serving the work area if your system supports zoning, so dust cannot migrate into unaffected rooms.
Cleaning vent covers and grilles
Remove the plastic sheeting only after the rest of the room has been HEPA vacuumed and damp-wiped. Take off each vent cover and vacuum both sides with a brush attachment, the back of a return grille often holds more dust than the front. Wipe with a damp microfiber cloth, dry completely to prevent rust, and set aside.
Filter replacement schedule
Replace the HVAC filter at two points: once before cleanup begins (if already loaded) and again after the job. A filter that captured construction dust has done its job and should not stay in service. For most residential systems, MERV 8 to MERV 13 balances dust capture and airflow; higher ratings capture more but can restrict airflow in older systems.
Never run the HVAC system during active sanding or cleanup, even briefly. A single cycle can pull airborne dust into every duct in the building and undo hours of containment work.
Step 4: Damp Cloth vs. Dry Dusting for Walls, Ceilings, and Trim
A damp cloth beats dry dusting for drywall dust every time. Dry dusting lifts particles into the air, where they resettle on surfaces you already finished. A slightly damp microfiber cloth traps the dust instead of launching it.
Surface-specific cleaning protocols
Different surfaces need different handling. Painted walls tolerate a damp microfiber pass; flat ceiling paint is more fragile, so use a lighter touch. Natural wood trim needs a barely damp cloth, dried immediately. For grout, a soft brush and diluted vinegar lift residue without abrasion.
Cleaning walls and ceilings before painting
If you plan to paint, the walls must be dust-free first. Residual dust prevents primer and paint from bonding, causing peeling and uneven coverage later. Wipe down every surface, then run a tack cloth over it just before priming.
Painting over dusty drywall is one of the most common and costly renovation mistakes. The finish may look fine for a few weeks, then blister or peel because the primer never bonded to the surface.
Step 5: Mop Floors and Repeat Until Residue Is Gone
Floors are the final pass, and surface-specific protocols matter most here. Drywall dust behaves differently on hardwood, carpet, and tile, and the wrong method can drive particles deeper or damage the finish. Most guides give one mopping instruction for every floor type; that is a mistake.
Hardwood floors
Drywall dust is abrasive. On hardwood, dry mopping or sweeping drags those particles across the finish and can leave fine scratches. Start with a HEPA vacuum using a hard-floor attachment, not a beater bar, which can grind dust into the grain. Follow with a barely damp microfiber mop, wrung out until almost dry; excess water can seep into seams, swell boards, and dull the finish.
Carpet
Carpet is the hardest surface to fully clear because drywall dust sifts into the pile and backing. Mopping is not an option. The protocol is repeated HEPA vacuuming with slow, overlapping passes, fast passes leave dust behind. Low-pile carpet often needs two or three passes; plush or high-pile carpet needs more, vacuumed in two directions (north-south, then east-west) to lift dust from different angles.
Tile and grout
Tile is the most forgiving surface, but grout lines trap dust. Vacuum first with a soft-bristle brush attachment, then mop with a mild detergent solution followed by a clean-water rinse. For grout that still looks chalky, a soft brush and diluted vinegar (about one part white vinegar to four parts water) lift residue without abrasion.
The two-bucket method and when to change water
Fill one bucket with a mild detergent solution and one with clean water. Mop a small section, then rinse the mop head in the clean-water bucket before reloading with detergent. Change the water frequently; once the rinse water looks milky, it is just spreading residue. Hard floors often need two or three passes before a white cloth comes up clean.
Surface-specific protocols are what separate a professional post-construction clean from a DIY pass. Hardwood, carpet, and tile each need a different method, and using one approach for all three is the most common reason dust keeps reappearing.
Post-Construction Cleaning Checklist for Every Room
A post-construction cleaning checklist keeps the job consistent from room to room. Use this one as a template for each space.
- Seal doorways and vents before cleanup begins
- Remove and bag large debris
- HEPA vacuum ceilings, walls, and trim, working top to bottom
- Vacuum corners, baseboards, and window tracks with a crevice tool
- Damp-wipe all surfaces with microfiber
- Clean and reinstall HVAC vent covers
- Mop hard floors until rinse water stays clear
- Replace the HVAC filter
- Run a tack cloth over surfaces to be painted
- Clean and store tools, including the shop vac filter
| Room Area | Method | Repeat Until |
|---|---|---|
| Ceilings and walls | Damp microfiber wipe | Cloth comes up clean |
| Corners and trim | Crevice tool vacuum | No visible residue |
| Grout and tile | Soft brush plus vinegar solution | Grout lines look uniform |
| Hard floors | Damp mop and rinse | Rinse water stays clear |
| HVAC vents | Brush vacuum and damp wipe | No dust on the cover |
| Carpets | HEPA vacuuming | No dust lifts on contact |
Frequently Asked Questions
What dissolves drywall dust?
Drywall dust is best removed with physical methods rather than chemical dissolvers. Use a HEPA-filter vacuum for dry removal, then follow with a damp microfiber cloth using a mild detergent or vinegar solution. For grout and crevices, compressed air can help dislodge packed dust before vacuuming. Avoid soaking surfaces, as excess water can damage joint compound and create new problems. The goal is to capture fine particulate matter, not dissolve it.
Is breathing drywall dust harmful to your health?
Yes. Drywall dust contains fine particulate matter, including silica, which can irritate the lungs and cause respiratory issues with repeated exposure. The CDC and OSHA recommend wearing a respirator and safety goggles during cleanup. Proper ventilation and dust containment also reduce airborne particles. If you are sensitive to dust or have pre-existing respiratory conditions, consider hiring a professional post-construction cleaning team to handle the work safely.
Can I use a regular vacuum to clean up drywall dust?
A standard household vacuum is not designed for drywall dust and will likely clog or damage its filter. Fine particles pass through standard filters and can be blown back into the air, making air quality worse. Use a shop vac equipped with a HEPA filter instead. The best vacuum for drywall dust has sealed filtration, a crevice tool, and a capacity large enough to handle the volume without frequent emptying.
How long does it take drywall dust to settle?
Most drywall dust settles within 24 to 48 hours after sanding stops, but fine particles can remain airborne longer without ventilation. Dust trapped in HVAC systems or on high surfaces may recirculate for days. Run your HVAC fan with a clean filter and open windows when possible to speed settling. Repeat dusting and vacuuming over several days until no visible residue appears on dark surfaces.